
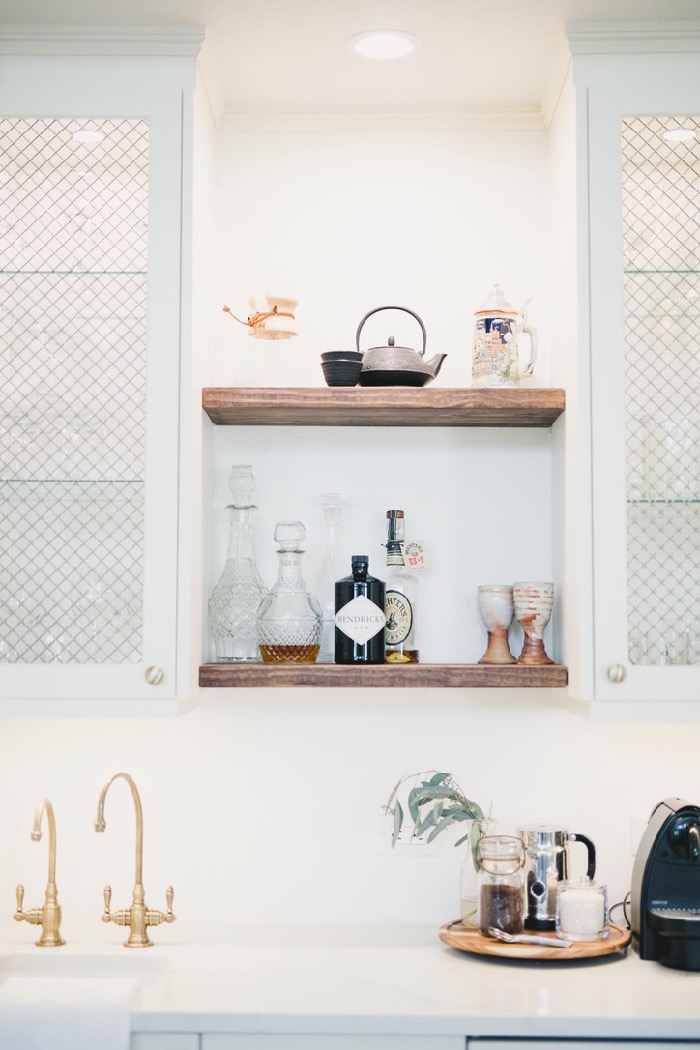
I knew pretty early in designing our kitchen that I didn’t want to do any upper cabinets, with the exception of the wet bar. Instead, I opted for floating shelves on either side of the range. Today I’m sharing how to install kitchen floating shelves.
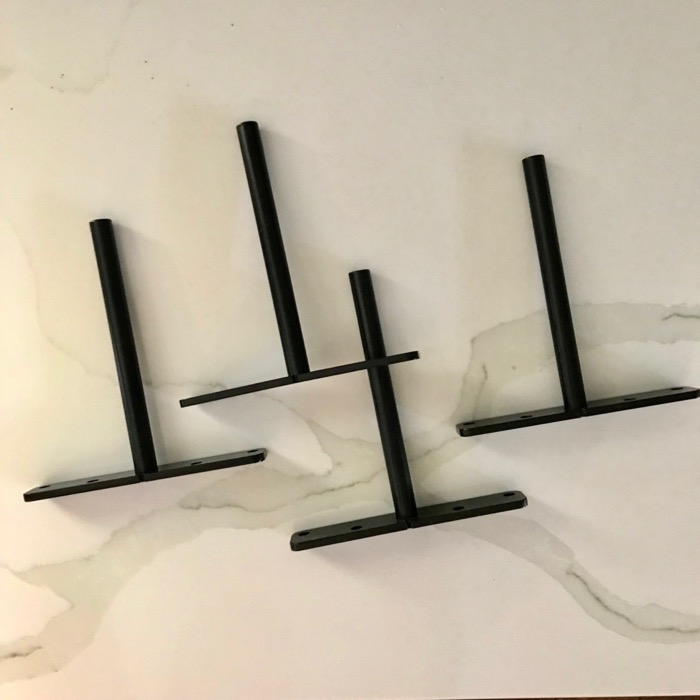
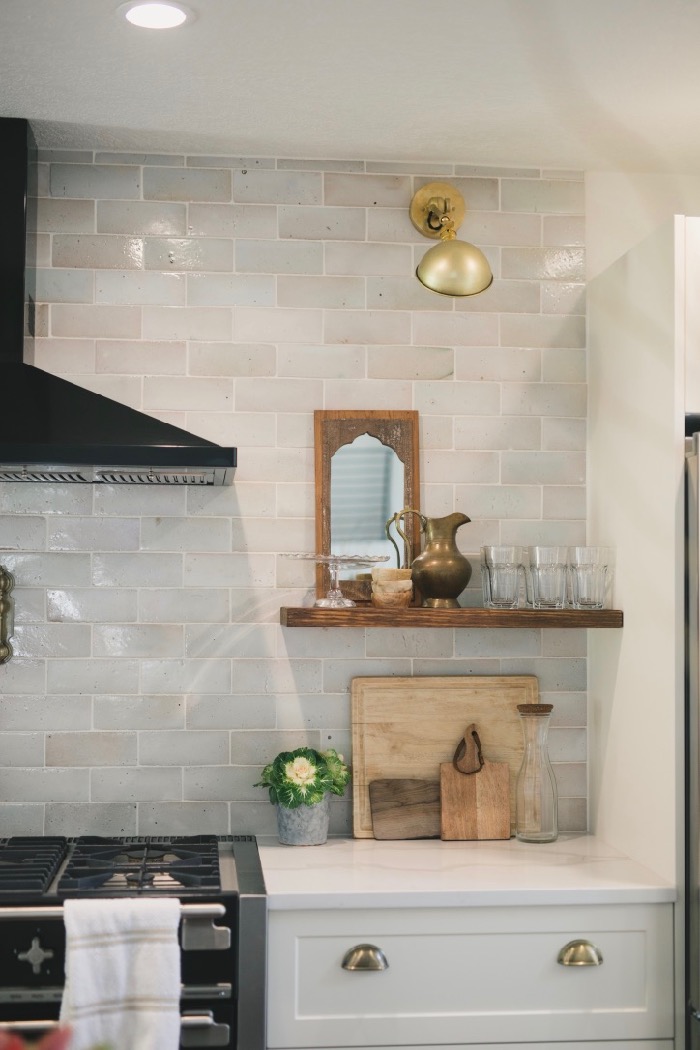
Our shelves were installed over the backsplash tile using these floating shelf brackets (affiliate link). They have two sizes depending on the depth of your shelves. Our shelves are 11″ deep – I wanted to be able to store dishes on them – so we used the large floating shelf brackets.
 How to Install Kitchen Floating Shelves
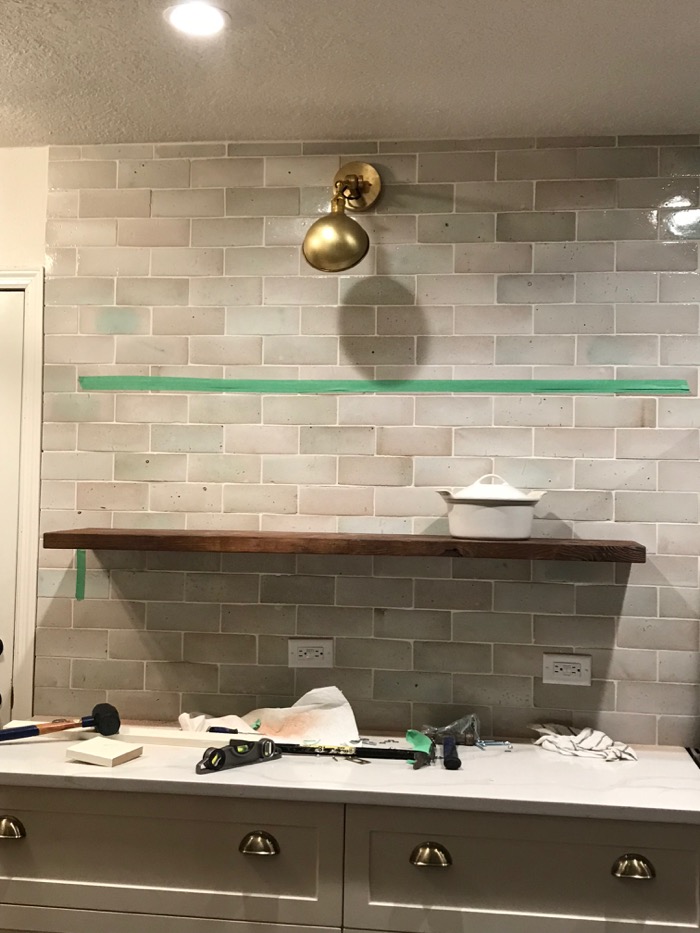
First, I used painters tape to mark out where I wanted the shelves to be. I adjusting the tape a couple of times over a few days until I was happy with the placement. Originally, I planned on 2 sets of shelves on either side of the range hood but after installing one we decided to stop there fearing two on each side would look too busy. Hubby was relieved since installation proved to be challenging.
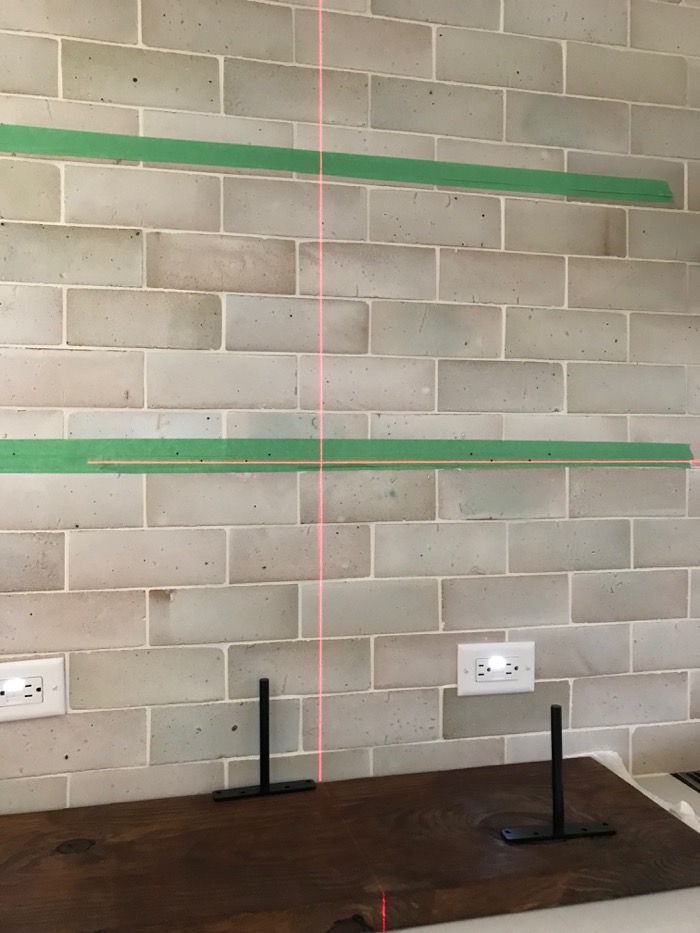 Using a laser level, mark pilot holes for the brackets. Hubby used a tile drill bit and left the painters tap in place when drilling to prevent slipping.
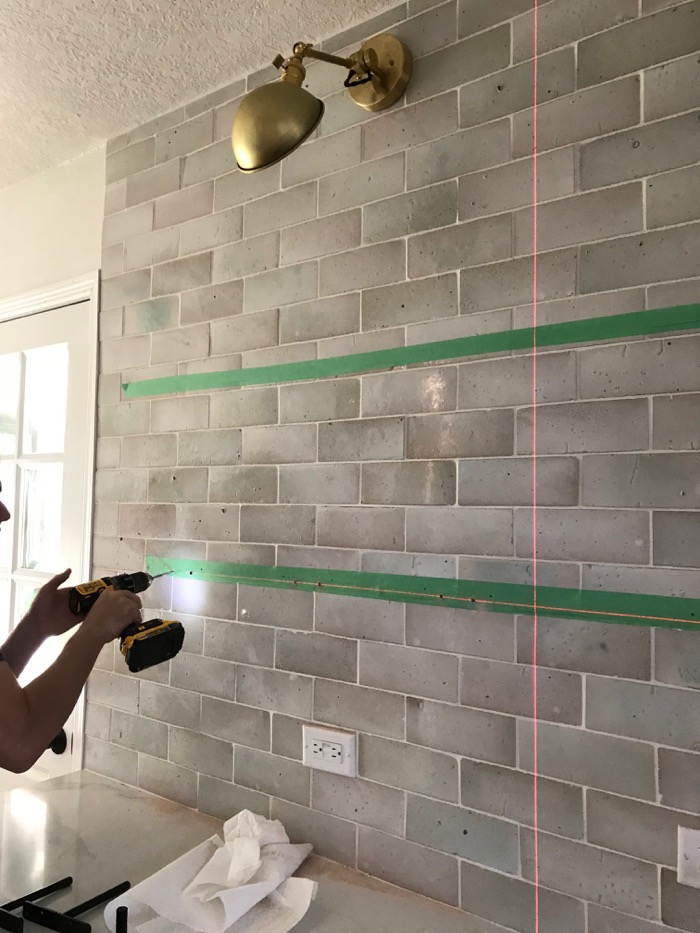
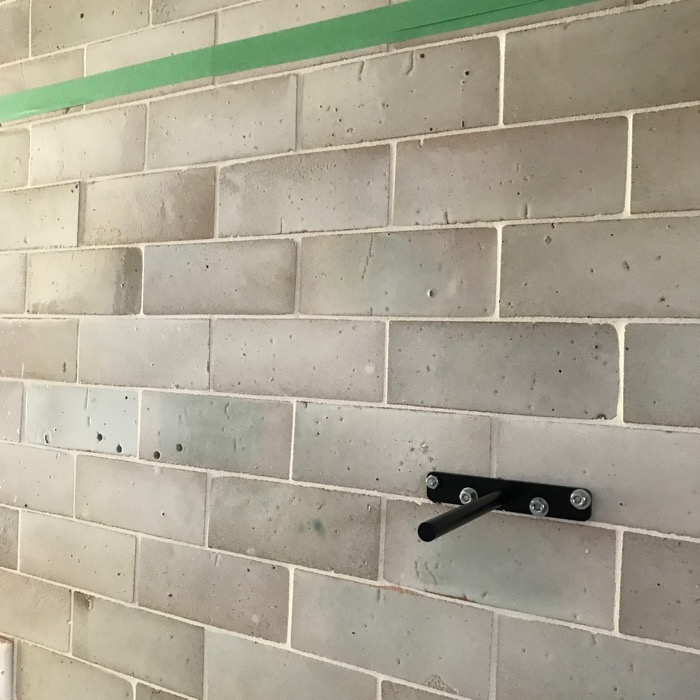
In our case, our brackets were installed on an exterior wall so there is concrete behind the drywall. Hubby used a concrete hammer drill to get through the concrete and concrete wedge anchors to secure the bracket to the wall. 
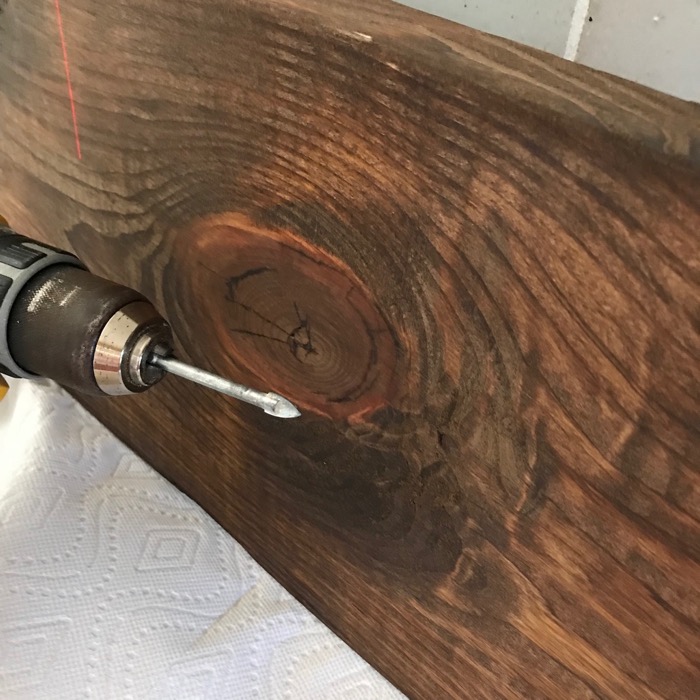
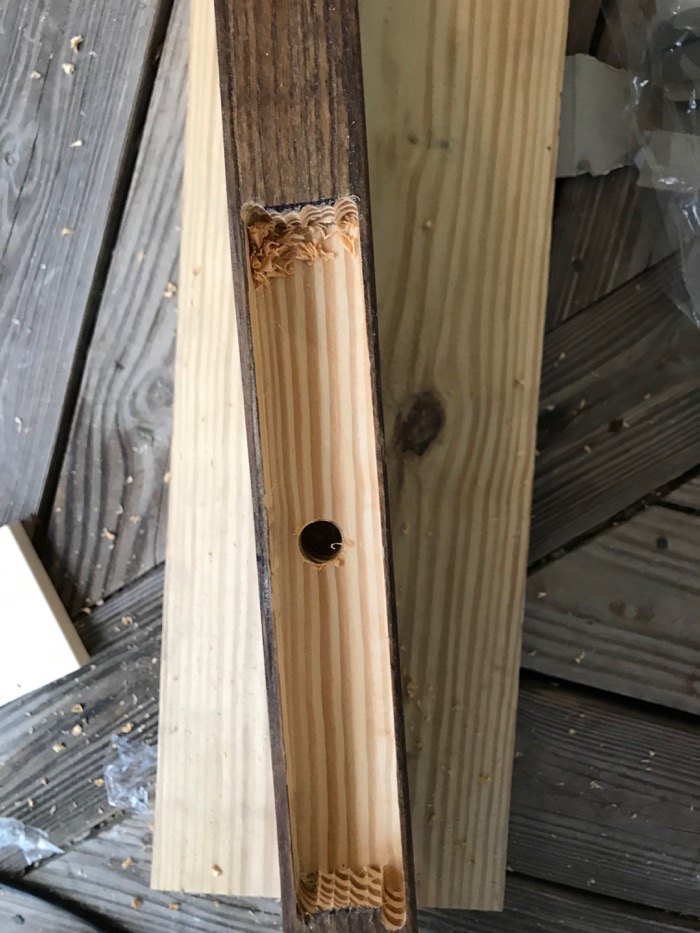
For the shelves, we used standard 2×12 ft lumber. Prior to installing we cut them to size, sanded and stained them. Once we determined the positioning of the brackets on the wall, we used a router to cut out a niche in the back of the wood to accommodate the back plate of the bracket. Then, we used a drill press to drill the holes for the bracket rod.
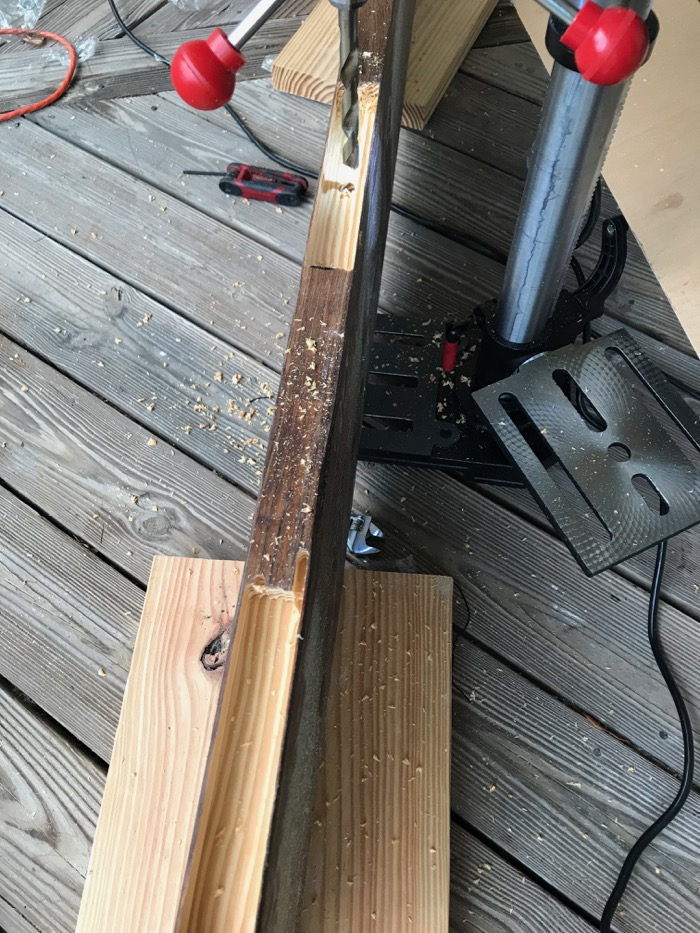
We went back with the drill to make the holes slightly larger than the diameter of the rod to create some wiggle room for install.
Once we had the brackets installed and the boards prepped with niches and holes for the rods, we slid the shelf onto each rod.
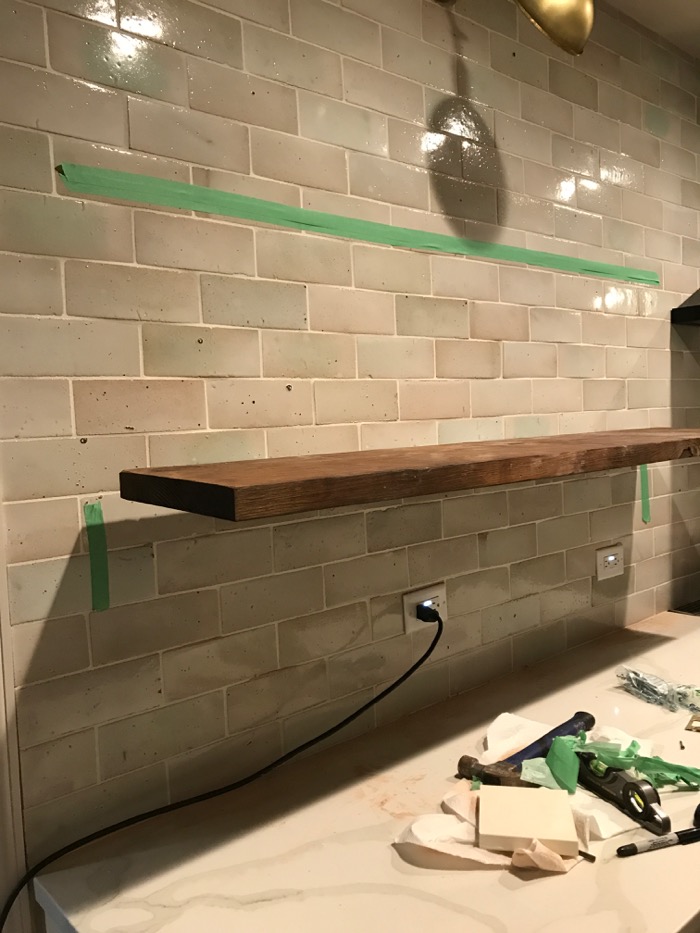

The shelf in this example measures 58″ and we used four brackets. This is pretty long, our subsequent shelves were half the length and much easier to install. Getting the holes we pre-drilled in the shelf to line up with the four brackets was tricky. The shelf was a very tight fit and we had to use a rubber mallet to get the shelf fully on the brackets and against the wall. 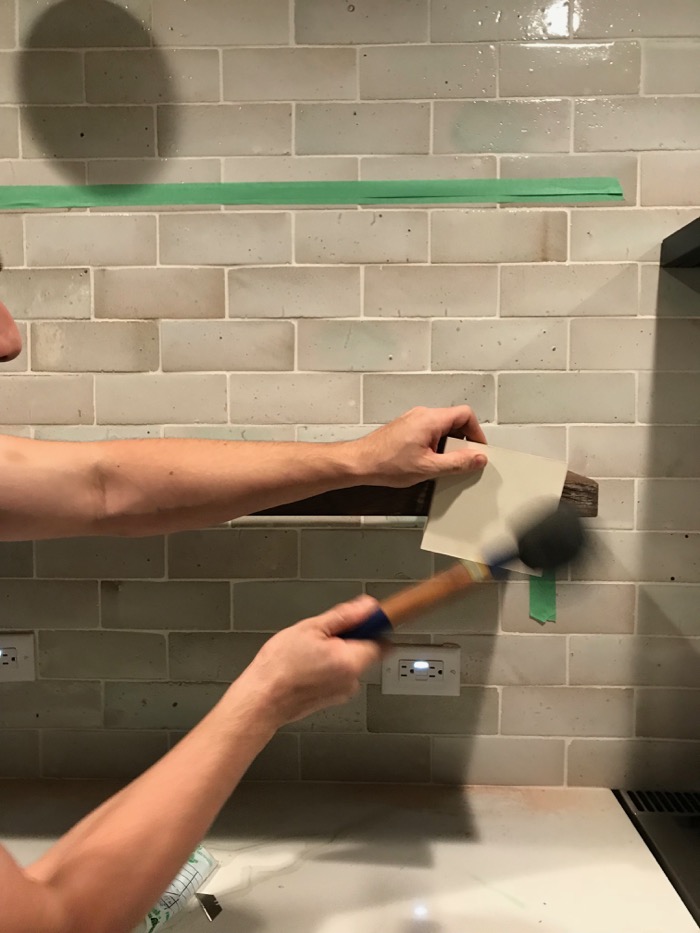
As you can see, despite all of our precise pre-measuring and drilling, our bracket does not fit 100% against the wall. 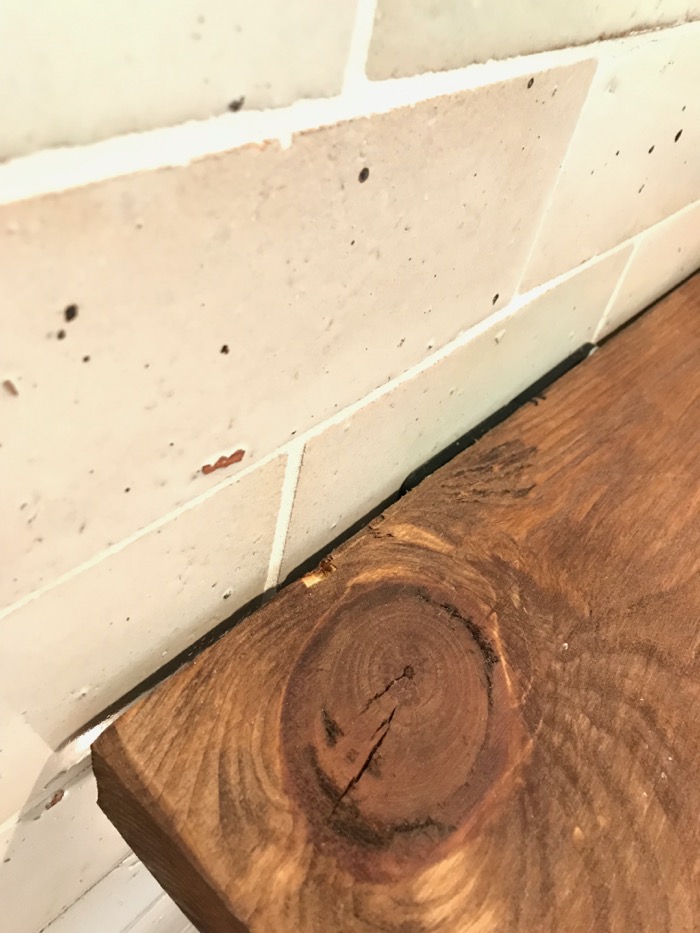
This is nothing a little caulk won’t fix but I did want to point it out.
So with all of that said, there are a few things we would recommend if you are taking on this project yourself.
How to Install Kitchen Floating Shelves: Recommendations
- If you are pre-drilling the wood shelves yourself, make the holes a bit larger than the diameter of the bracket rod to create wiggle room when installing. If the shelf is too loose, you can always apply some construction adhesive into the holes for extra security. We did this on our subsequent smaller shelves and it worked great.
- If you are using a backsplash tile that is handmade and/or not flat when installed on the wall, you may want to install the brackets prior to the tile. Our backsplash tile is a handmade glazed terra cotta tile that has a slight 3-D look when installed due to the slight curve in some of the tiles. This is exactly what I was going for, but when it came to installing the brackets over the tile, it complicated the job a bit because the brackets were not installed on a flat wall. Ashley over at Bigger Than the Three of Us installed floating shelves using this method and different brackets if you’re looking for a resource. The reason we didn’t do this is that I wanted to see the tile installed before committing to the placement of the shelves.
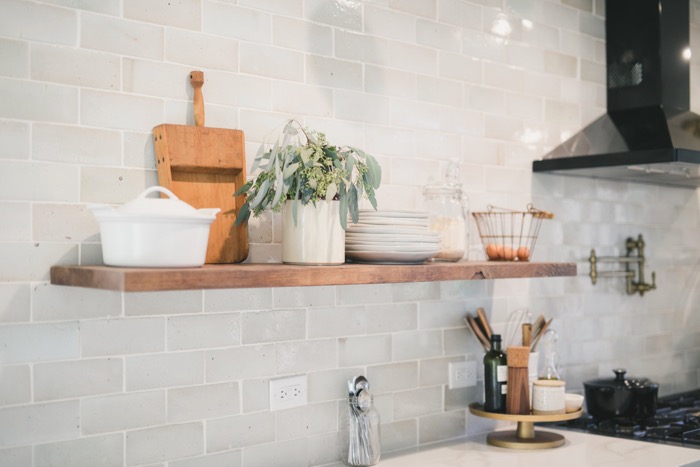
In the end, our shelves turned out great. We went on to install another one on the opposite side of the vent hood and two in the wet bar. I love having open shelves in the kitchen for ease of access. We use the items on our shelves daily and I love the contrast and warmth the wood shelves give against the tile.
Pin this post for later: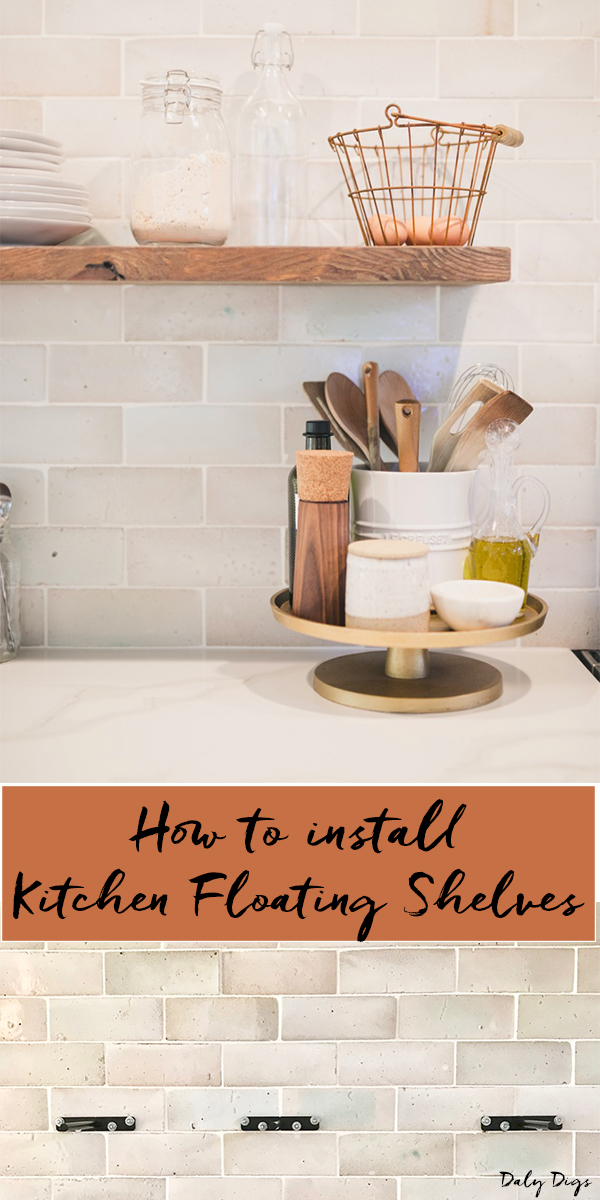
“After” photography by Roohi Photography. For kitchen resources check out the kitchen reveal.


5 Responses
I wouldn’t recommend people using this system over tile for a couple of resins but mainly because if you put any kind of weight on it it’s sure to crack the tile or grout joint. Much better pre drywall but good luck with layout.
Our tile was scheduled before we could install the brackets so it is what it is. The shelf brackets are mounted into an exterior block wall and are very secure. We haven’t had any issues with weight on the shelves in the few years they’ve been installed.
what tile is on your walls? Love it
Cle tile limited kiln load called “white peony” that isn’t stocked. Cle’s weathered white is very close.