
Our kitchen remodel is moving right along. Since last week, we got down and dirty with some demolition and worked a lot on kitchen cabinet planning, which was pretty darn exciting.
Demo Update
Over the weekend, we tore out the entire island and most of the back wall and started on the overhead built-0ut. There was a lot of ugly tile to demo.

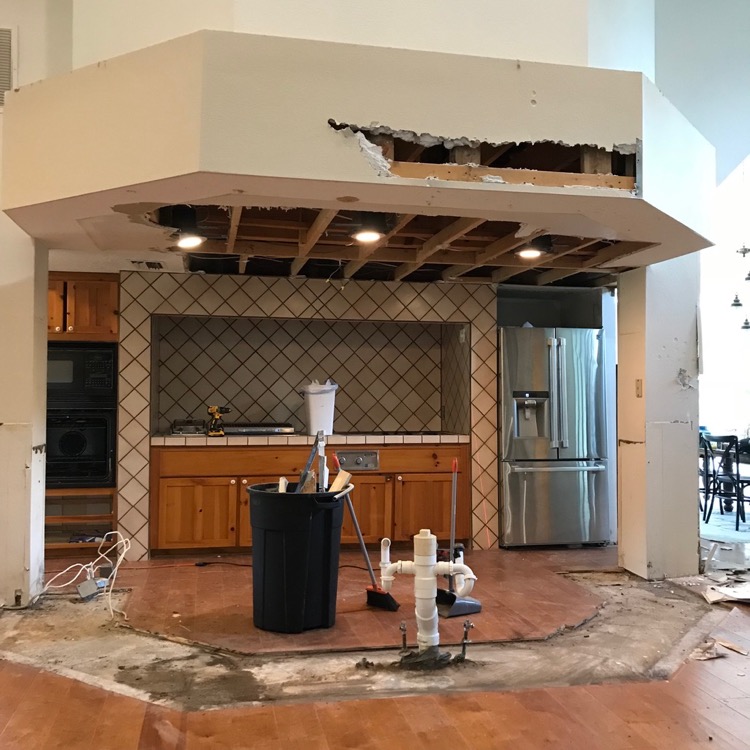

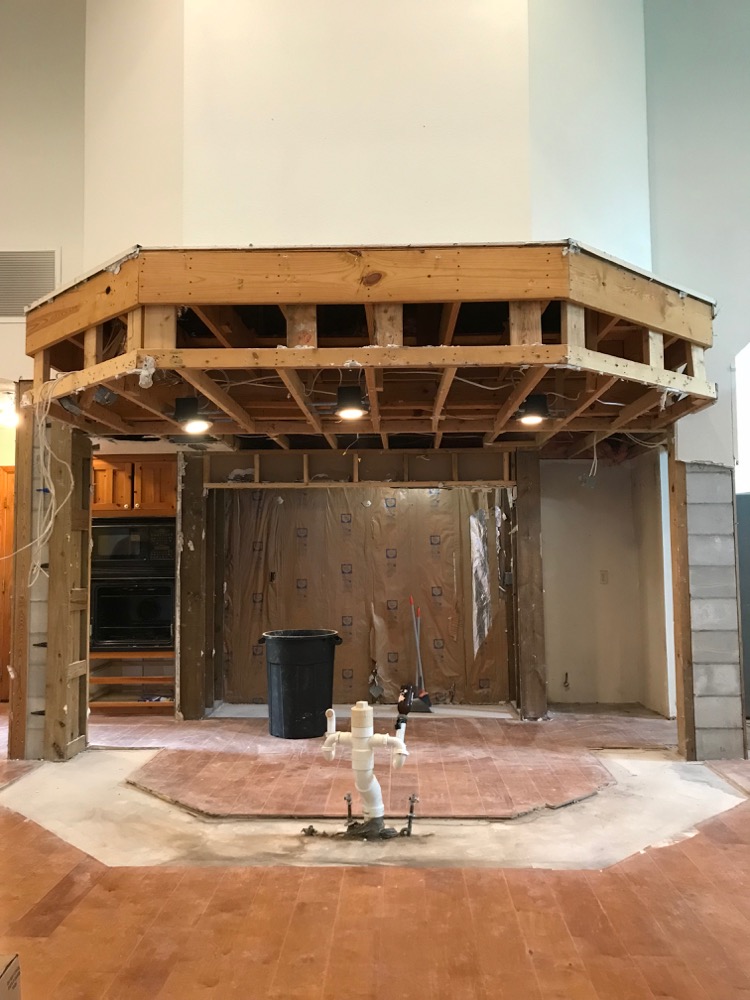
That’s pretty much where we ended after two days of demo and completely filling up our dumpster. We have another dumpster on the way and this weekend we should be able to knock out the remainder of the back wall/wall oven/microwave and upper build-out.
The next step is the demolition of the floors, which we’re hiring out for. It’s just too difficult and time-consuming for us because of the way they were installed, so we’ll leave it to the pros who can do it in 1 – 1.5 days. (The floors extend into the dining room on the right, as well as the hallway and entry, so it’s not just what you see here.) After the floors are removed, we have to install a gas line for our new range and move the sink plumbing about 3 feet (closer to the back wall). While the plumber is here we’re also going to add plumbing for a pot filler (yay!), which will come off of the existing water line to the fridge. I also need to get an AC guy and an electrician over to take a look and discuss re-wiring all those wires that are in the upper build-out that we’re eliminating.
Kitchen Cabinet Planning with IKEA
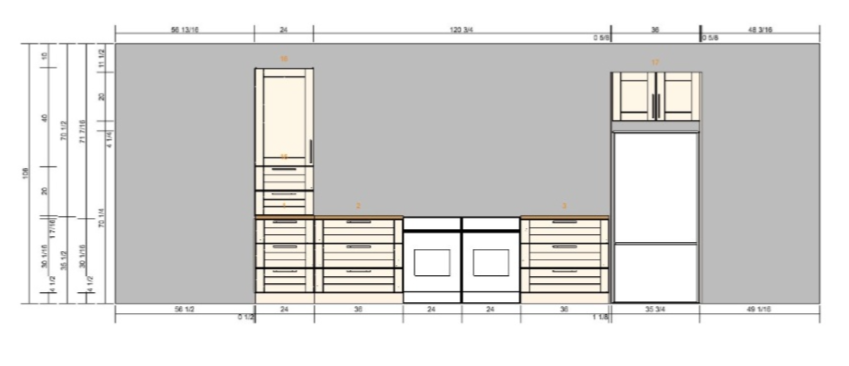
As you may recall, we decided to use IKEA cabinets and doors from Semihandmade. IKEA has been great to work with and my kitchen guru was very helpful during my kitchen cabinet planning appointment. Here’s a rendering of our kitchen from the IKEA kitchen planning tool. Pay no attention to the countertops and doors, this is strictly for cabinet layout planning only.
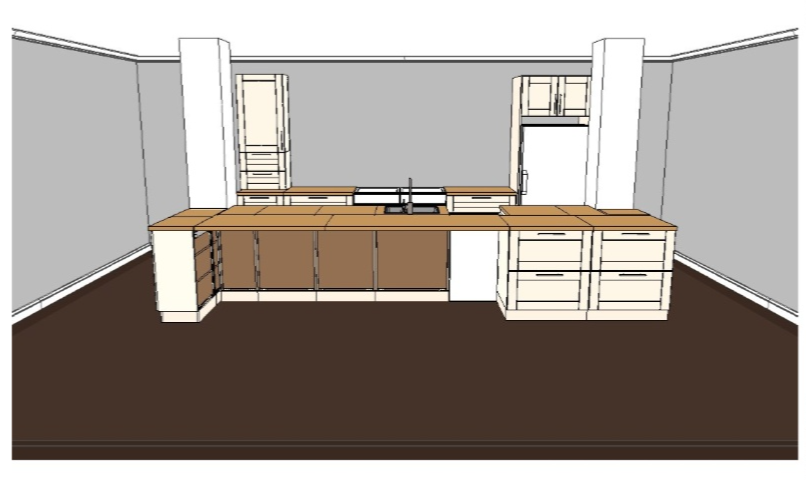
We have no upper cabinets in the kitchen and have very few traditional cabinets and opted for mostly drawers instead. If you follow me on Instagram, then you know that the microwave was on the back wall, but I decided to move it to the island to eliminate it from the line of sight and keep the back wall looking cleaner. My client and a couple followers suggested a microwave drawer so I’m hoping that will work with the IKEA cabinet.
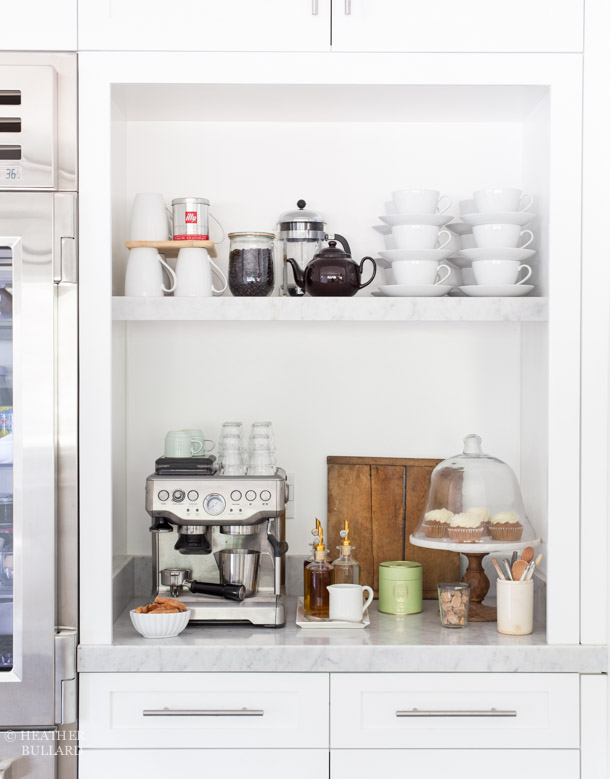
There are a couple of other things we’re still considering. The first being the dimensions of the cabinets along the back wall. I may go 36″ with the base and wall cabinets on the far left and do 30″ cabinets on either side of the range. This will make the back wall symmetrical which then will center the range on the back wall and align the center of the sink with the center of the range. I may also eliminate the drawers on the wall counter cabinets (where the microwave used to be) and opt for two cabinets instead so that I can do a coffee station in the bottom cabinet, and perhaps leave it door-less. I’m very inspired by this coffee station:
The second thing we’re still mulling over regarding kitchen cabinet planning is the depth of the island. The island is already huge (it’s 190″ wide) but after taping it out, it feels like we should go larger with the depth. Currently, the depth is ~52″ but I think an additional ~10″ would make it feel better in the space. The main concern with making it larger is the expense of the countertop, which is already pretty hefty.
 Here is the inside of the island with the sink in the center, the dishwasher to the left of the sink and a trash drawer and microwave to the right of the sink. I’m doing a farmhouse sink with an apron so the sink cabinets will be smaller.
 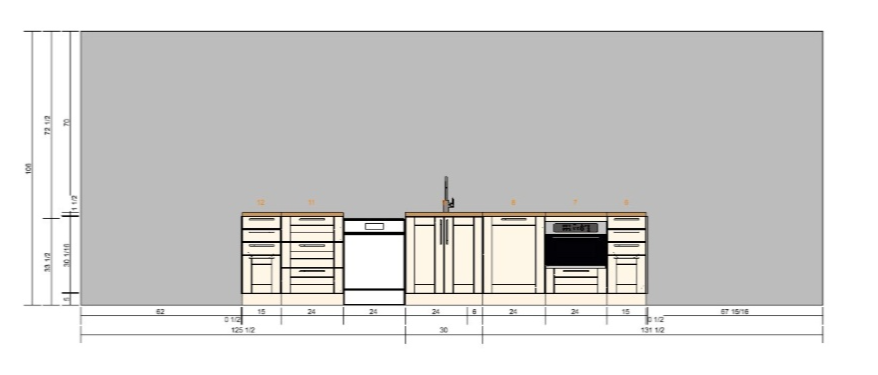 There are also some additional cabinets we snuck in on the sides of the island for extra storage. Working through the kitchen cabinet planning was so fun and it was exciting to see my ideas start to come together in a rendering.
Other Design Updates
In other kitchen design-related news, I pulled the trigger on this amazing glazed terracotta subway zellige tile from Cle Tile for the backsplash!
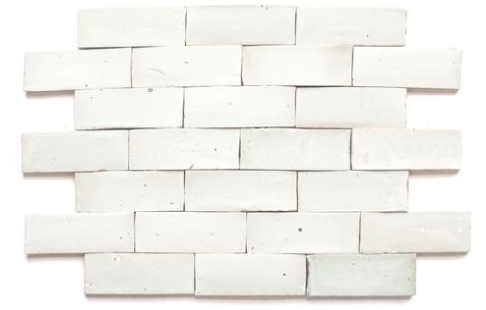
I went with the 3×8 size so that the backsplash wouldn’t’ feel too busy and while I was considering a herringbone pattern, I think I’m going to stick with the traditional offset pattern. However, I came across this image while on a 3am Pinterest session and was so excited I almost woke up my hubby to show him!
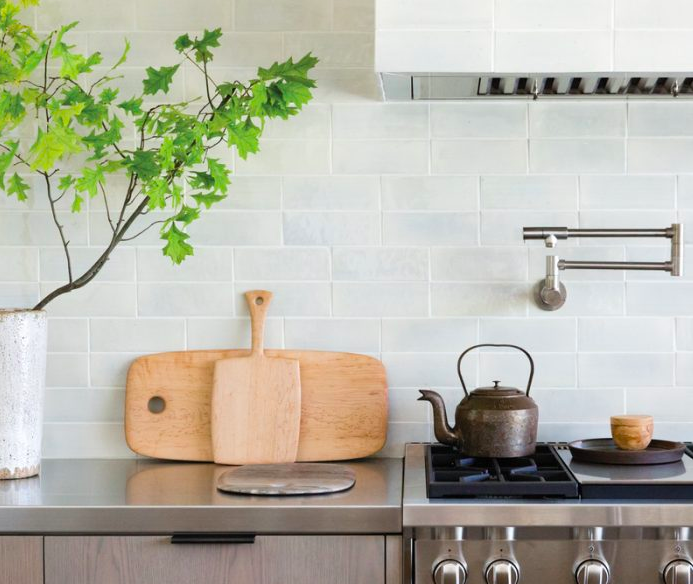
I love how they used two rows of brick in each offset line. I think it’s a fun spin on a traditional offset pattern and I may copy it!
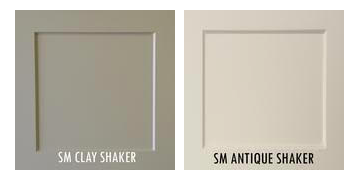
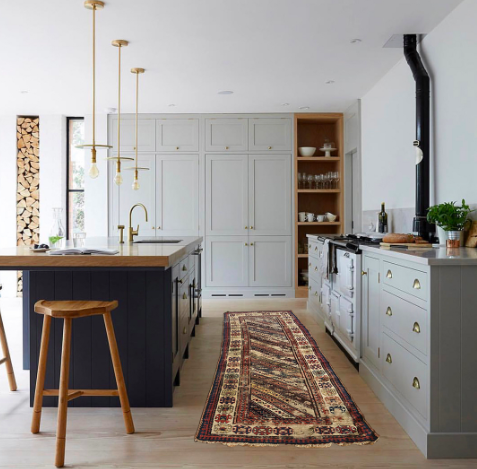
Also, remember how I included both Semihandmade’s super matte clay and antique cabinet color options on the initial kitchen material & finish mood board? Well, instead of picking one I am almost certain I’ve decided to go with both, one color on the back wall cabinets and one on the island cabinets. I’m just not sure which color is going where (insert facepalm) but I was inspired by this amazing two-tone kitchen:
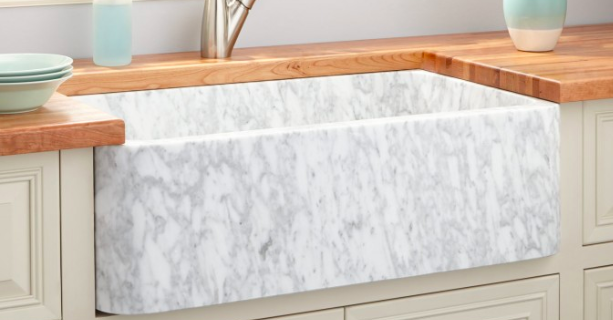
Otherwise, I’ve decided for sure to splurge on the marble farm sink. It’s from Signature Hardware and just too gorgeous to pass up. I think it will really elevate the look of the kitchen.
I have yet to decide on faucets – can’t decide between polished and unlacquered brass – and I have some cabinet hardware samples on the way as well.
That’s about it, folks! Stay tuned for another update soon and also an introduction to the powder room, pantry and mudroom remodel we’re doing simultaneously!


2 Responses
What colors are used on the cabinets and island on your inspo picutre???????
You’d have to check with the original sources.