
Remember the pony wall we used to have around our sunken living room? We removed the wall last year but after demolition, we were left with a big, hazardous step that we had to address before our new flooring (as part of the kitchen reno) could be installed. In the end, we built an additional step around the living room to create two code-friendly steps.
Pony Wall Removal and the Big Step that Remained
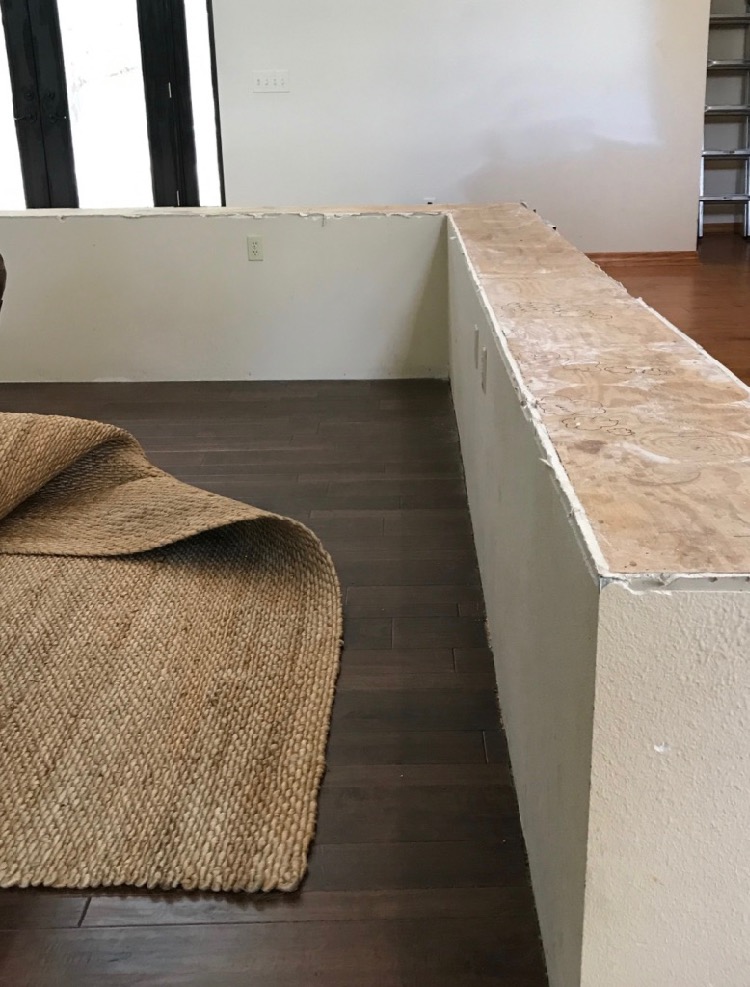
The pony wall served no real purpose other than making the large open living area of our house look dated. I hated the wall since we first saw the house so it had to go. We demolished it last year and I blogged all about it here.
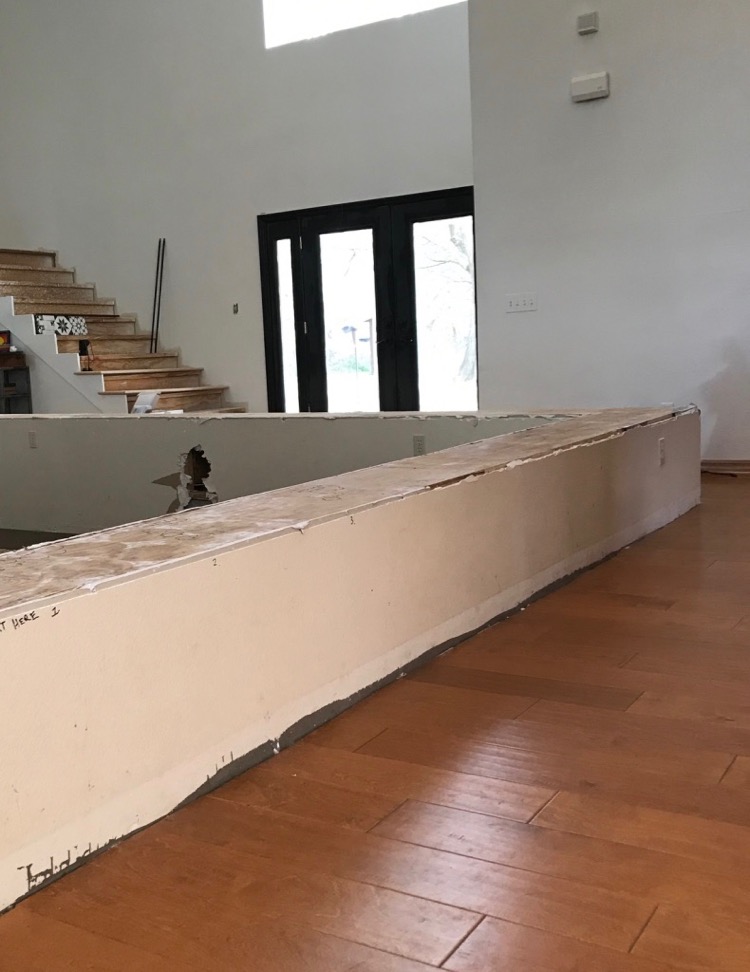
As you can see, after demolishing the pony wall, we were left with a huge 10″ drop down into the living room which is a safety hazard and code violation. Originally, our plan was to hire a concrete removal company and remove a chunk of the 10″ step in line with the lower, pre-existing step, to extend it all the way around the room.
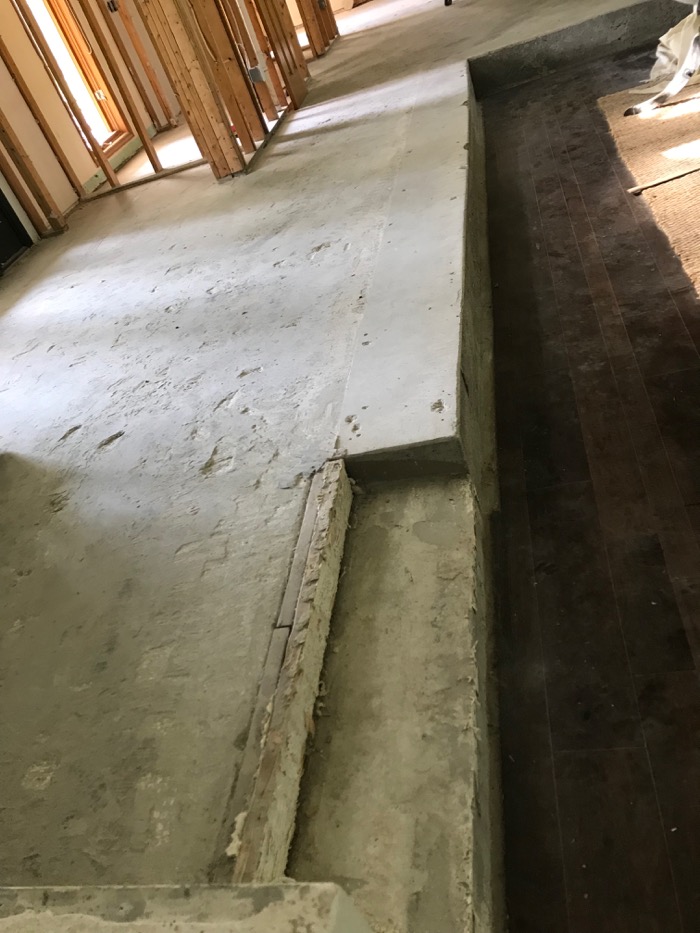
After talking to a couple of concrete removal companies we realized it wasn’t going to be that easy. Our engineer recommended against it too and suggested we build an additional step around the living room instead of cutting into the foundation. This was a much less expensive and messy option, so that’s what we ended up doing.
Building the Step around the Living Room
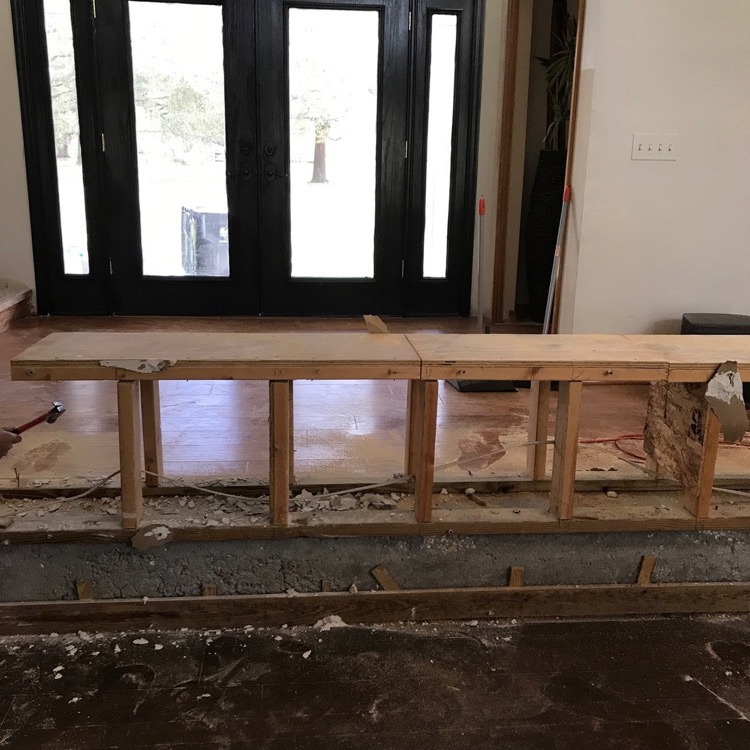
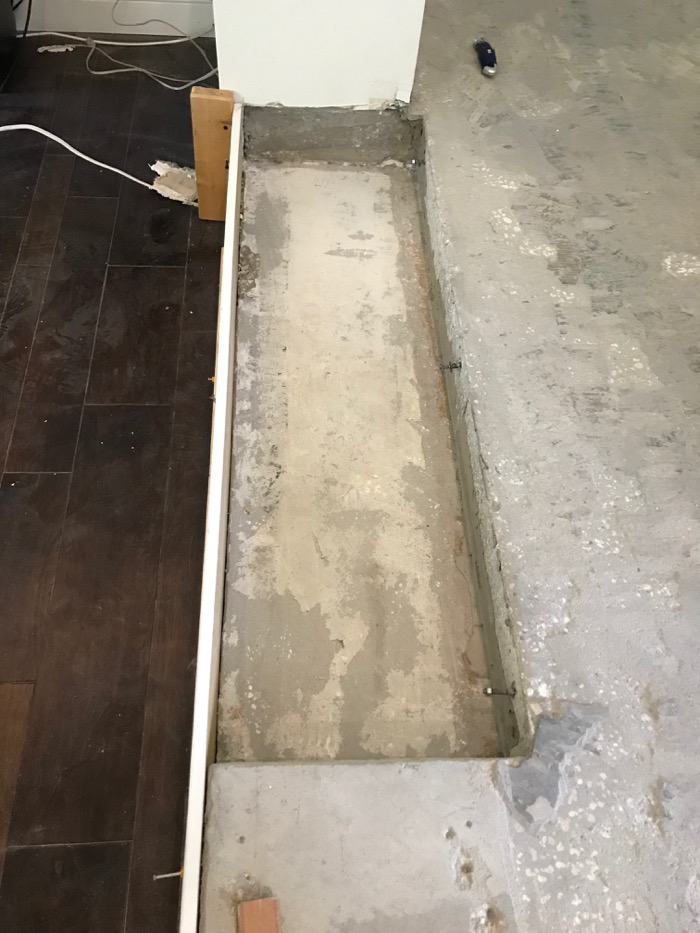
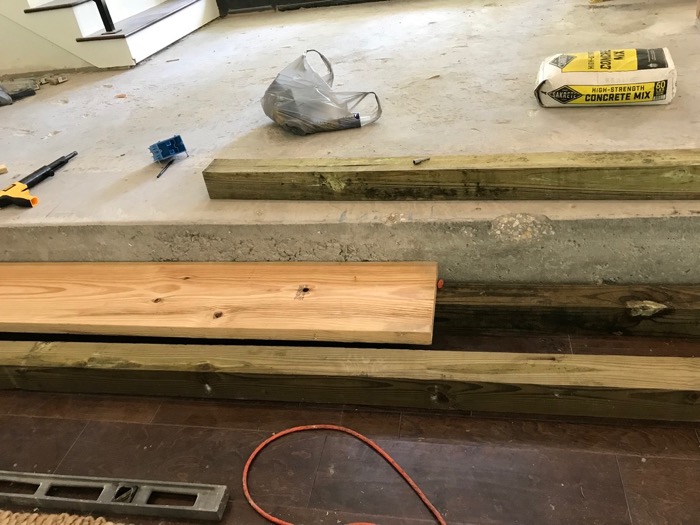
The first thing we had to do was fill in the two old steps with concrete. Since we’d be adding a new step all the way around the room, we wouldn’t need the pre-existing steps.
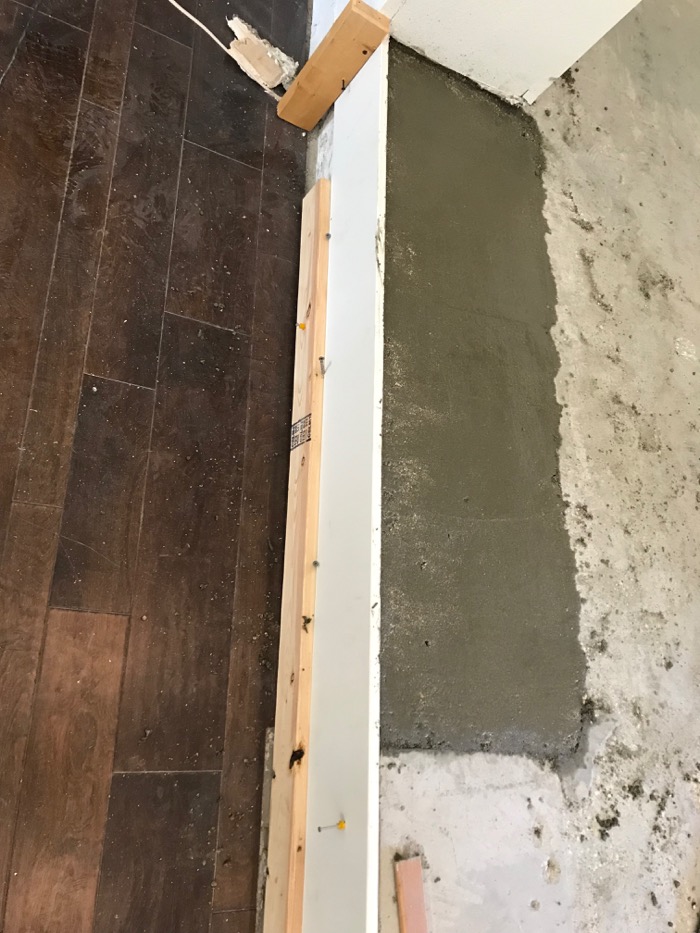
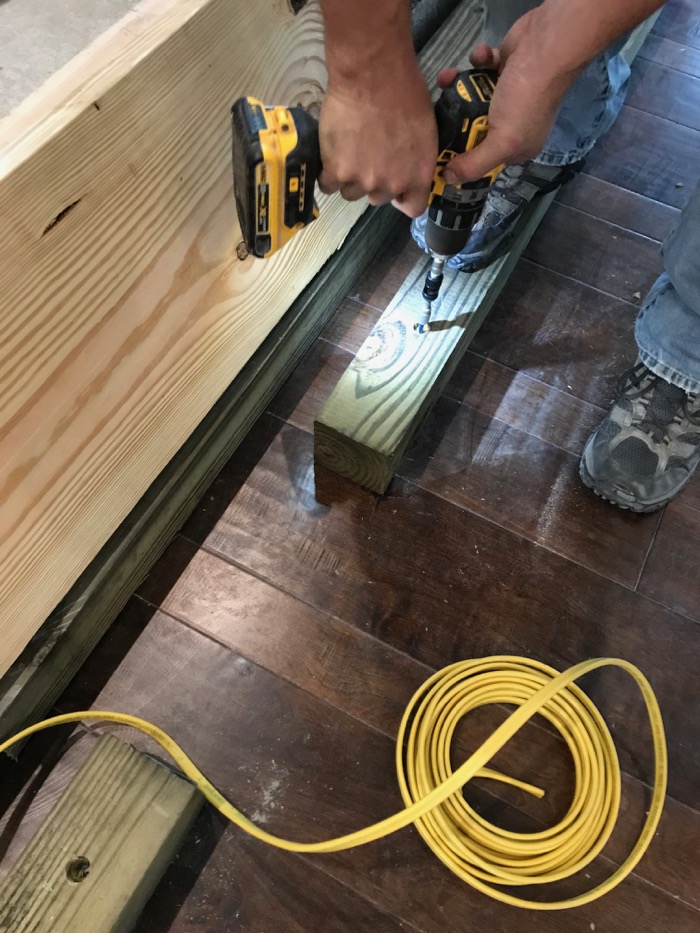
Once the concrete was dry, hubby removed the board used to form the edge and got started on constructing the step. To build the step, he drilled two 4x4s into the concrete foundation of the living room floor. Then he attached a 2×12 on top to form the tread of the step, the part you step on, making sure everything was straight and even along the way.
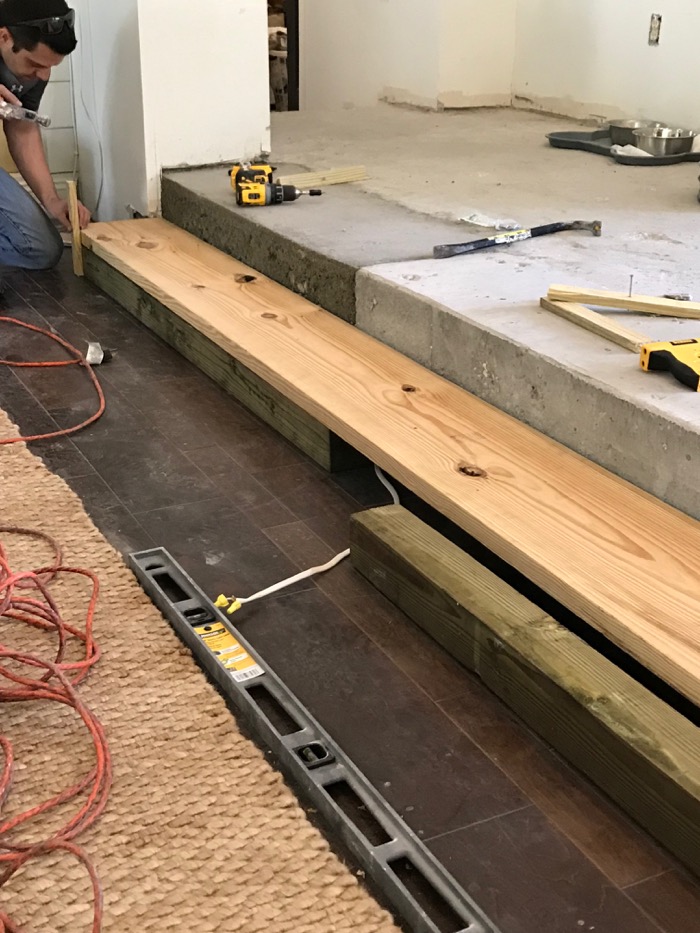
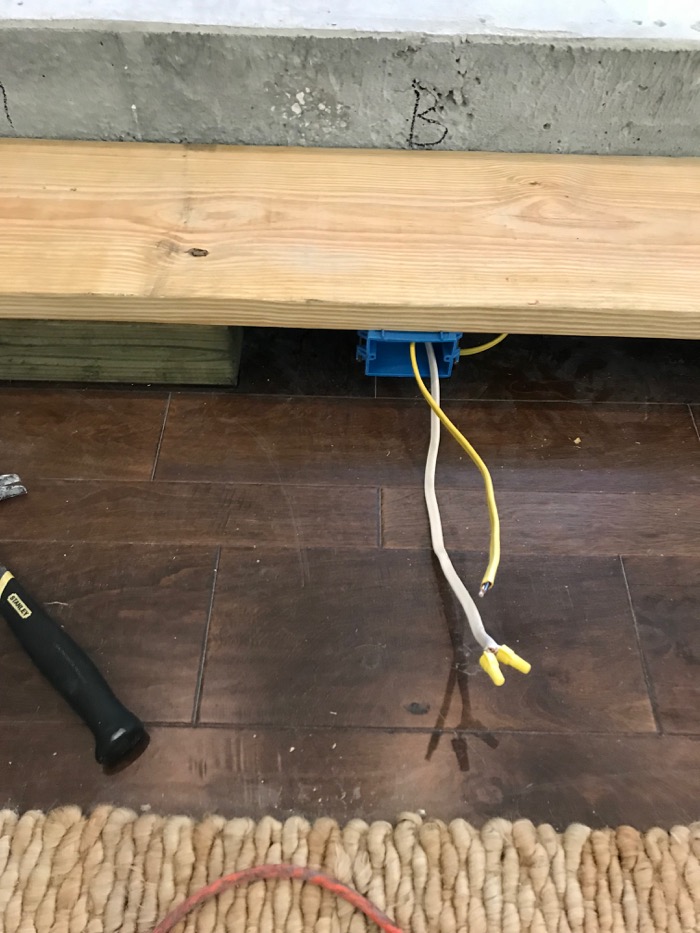
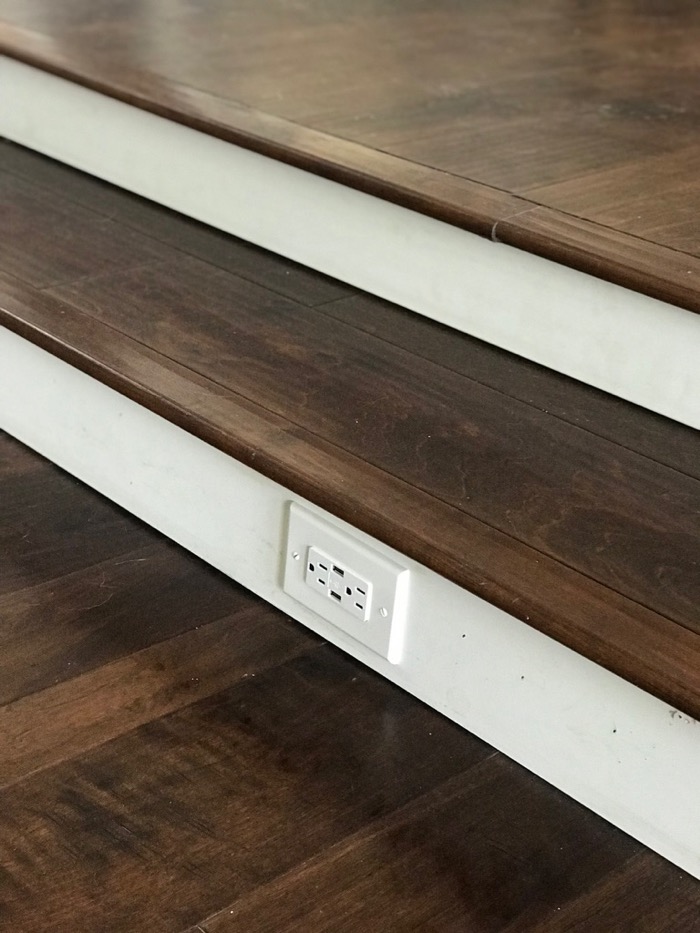
The previously existing pony wall conveniently had electric outlets. Since we already had the electric line, we decided to add three outlets built into the bottom step for future floor lamps, phone charging, etc.
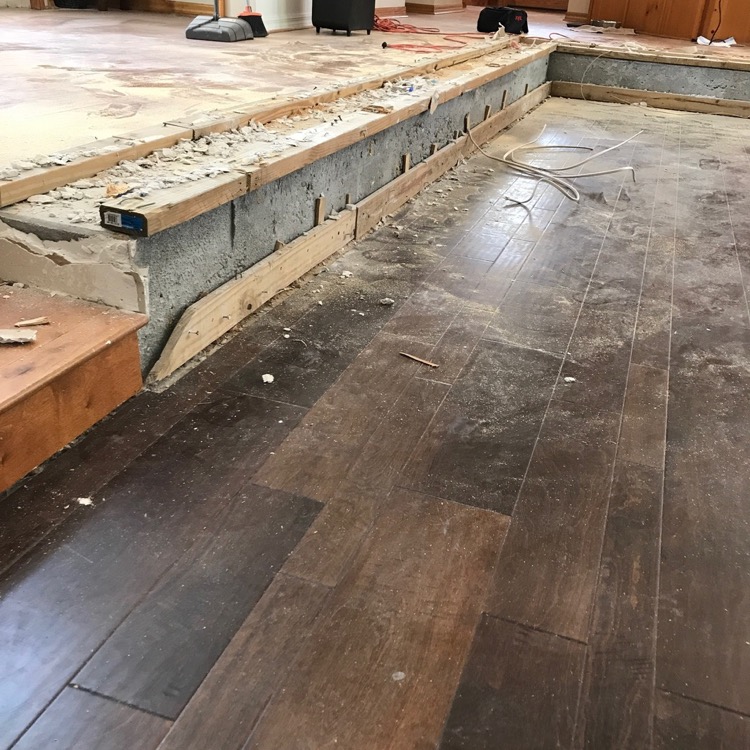
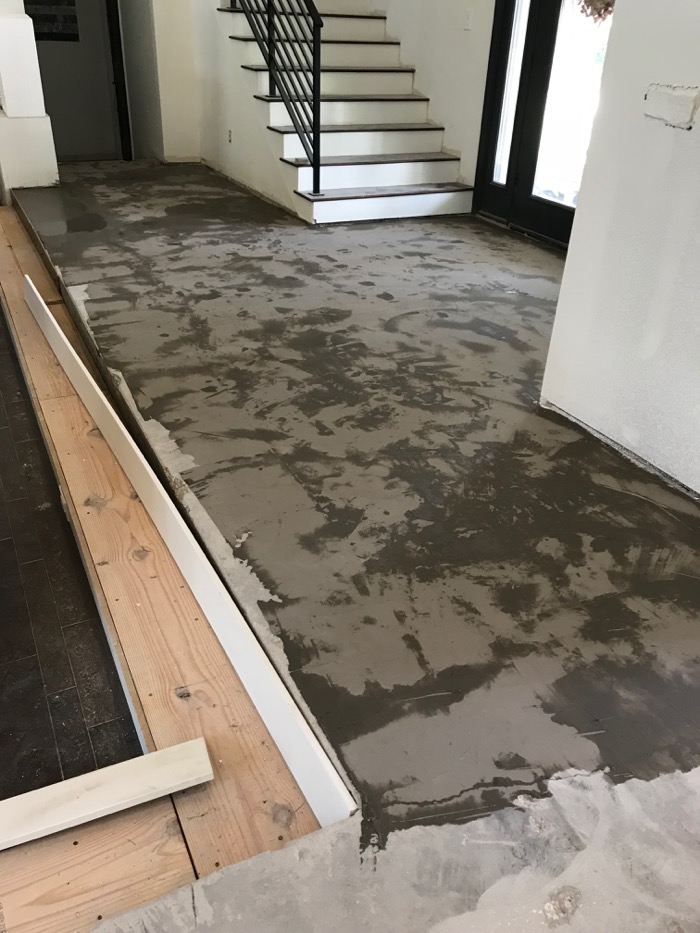
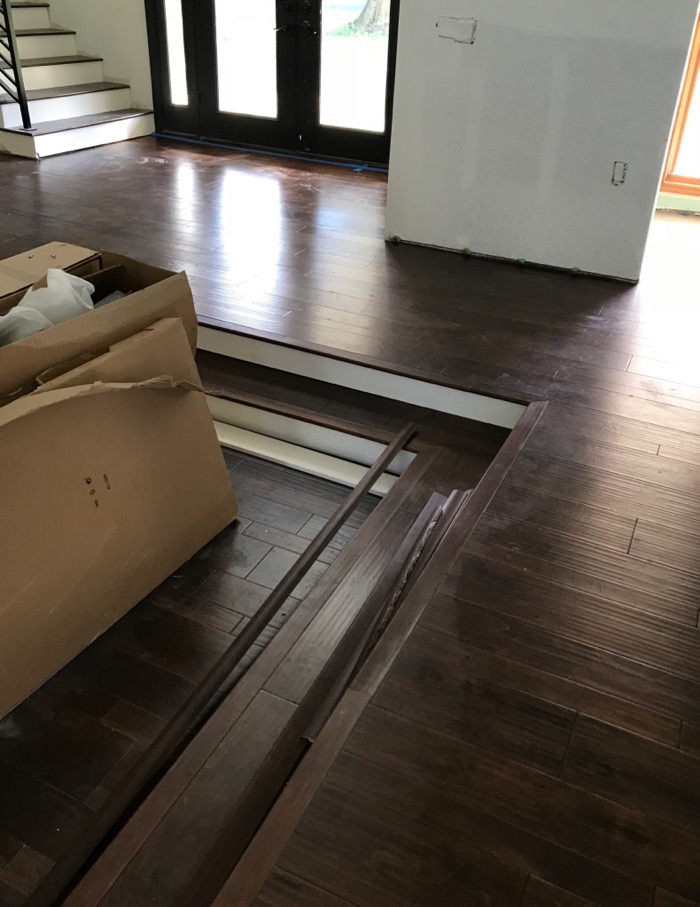
In the photo below, the hardwood flooring guys were prepping the upper-level floor for install of our new flooring, but you can see the step. We left the riser board for the top step unattached so that our flooring guys could install the riser on the bottom step, then put the riser over the tread for a seamless look.
See how the new flooring covers the step and integrates with the rest of the flooring on the upper level?
And here’s what it looks like now. As you can see, we still need an outlet cover for one of the outlets and we need to fill in the nail holes and touch-up paint, but you get the idea.
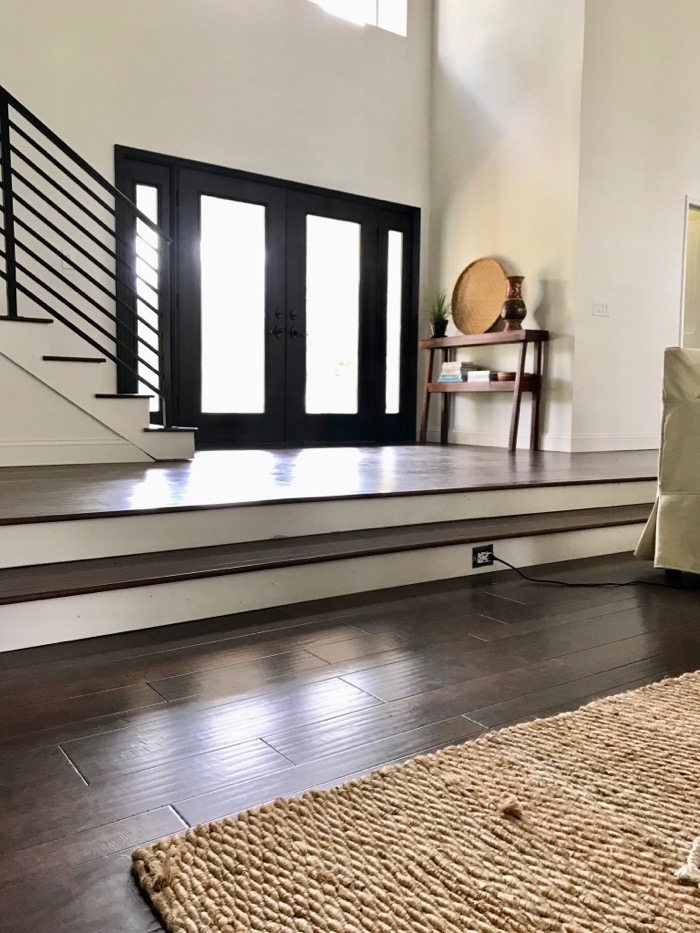
I have our subwoofer plugged into that outlet and it’s hiding in the basket beside the sofa. 😉
So there ya go, that’s what we did to solve our pony wall issue. We built an extra step around the living room. You can’t even tell that there used to be a wall there, which makes this DIY project a success! 🙂 What do you think about our DIY step?


2 Responses
Hi! This was very helpful!! I am currently in the process of the same removal. As for the electrical plug, how were you able to put it there abiding the electrical rule/ regulation height? (I hope that made sense)
We just did it, we didn’t have it inspected 😉