
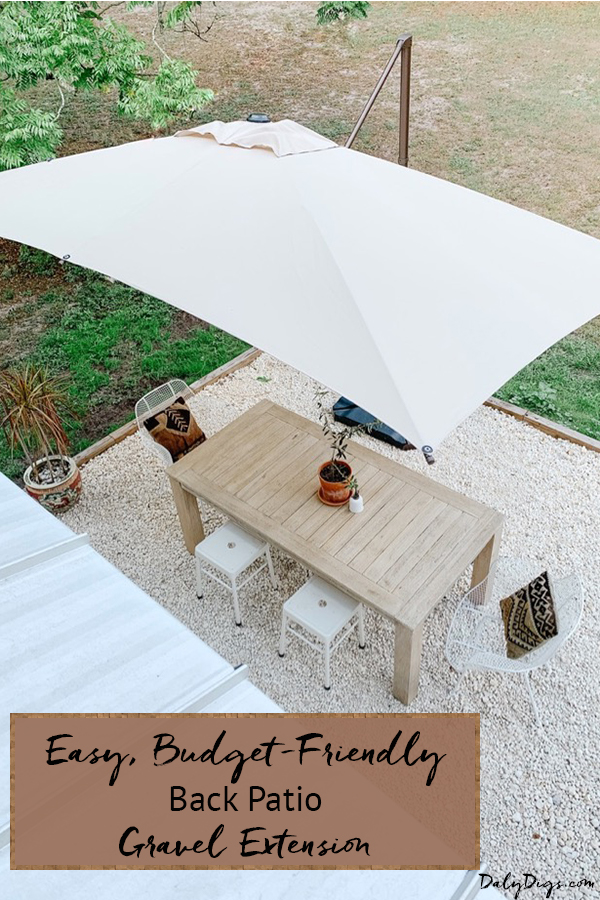
We recently decided to extend the livable space off of our back patio. One day we plan to add a pool, but until then we wanted a little more elbow room for grilling, outdoor dining and entertaining. Our back patio gravel extension was a quick, easy and inexpensive weekend project that made a big impact.
For more on the covered portion of our back patio, check out our backyard patio reveal here.
This post contains affiliate links. If you make a purchase using one of my links, I may receive a small commission for the referral. This post includes a review of gifted product(s). All opinions are my own and always will be.
Back Patio Gravel Extension
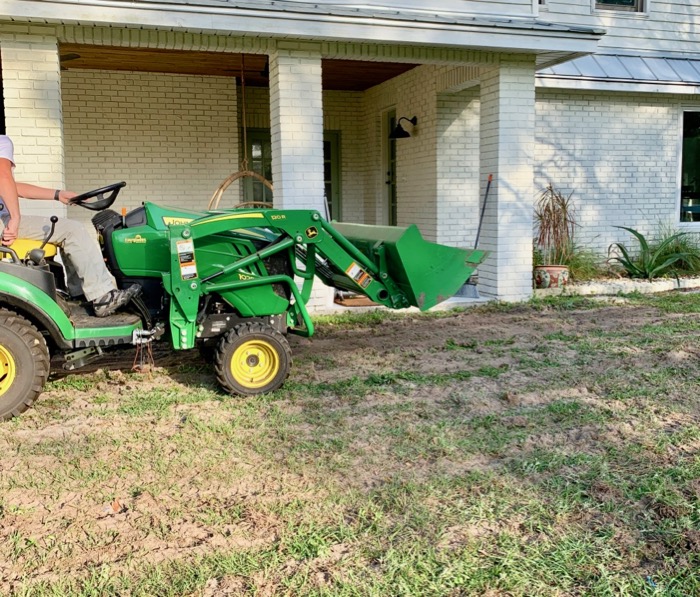
First, we started by grading the area off of the patio using the box blade attachment on the tractor.

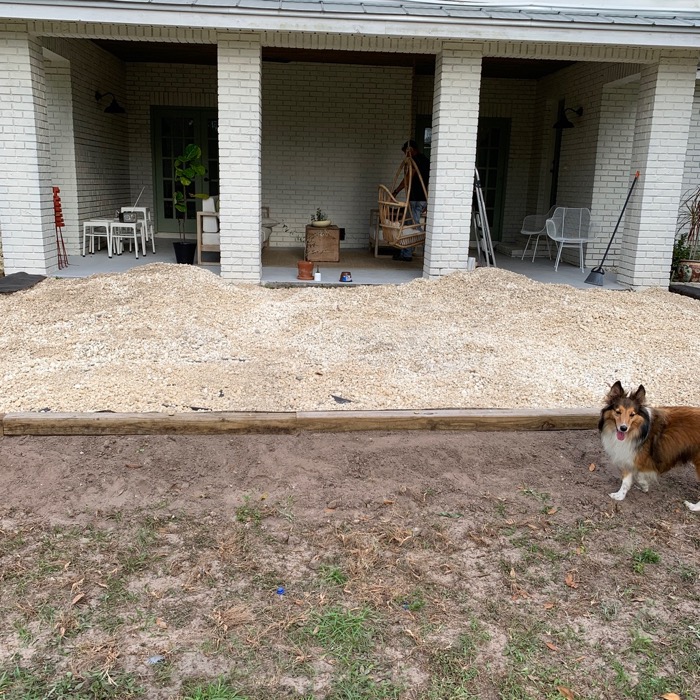
Once the area was relatively level, we boxed in the extension area using pressure treated 4x4s as a border. Then we laid weed blocking landscape fabric and had a load of limestone gravel delivered. We used 5 yards of gravel which cost $320 including delivery.
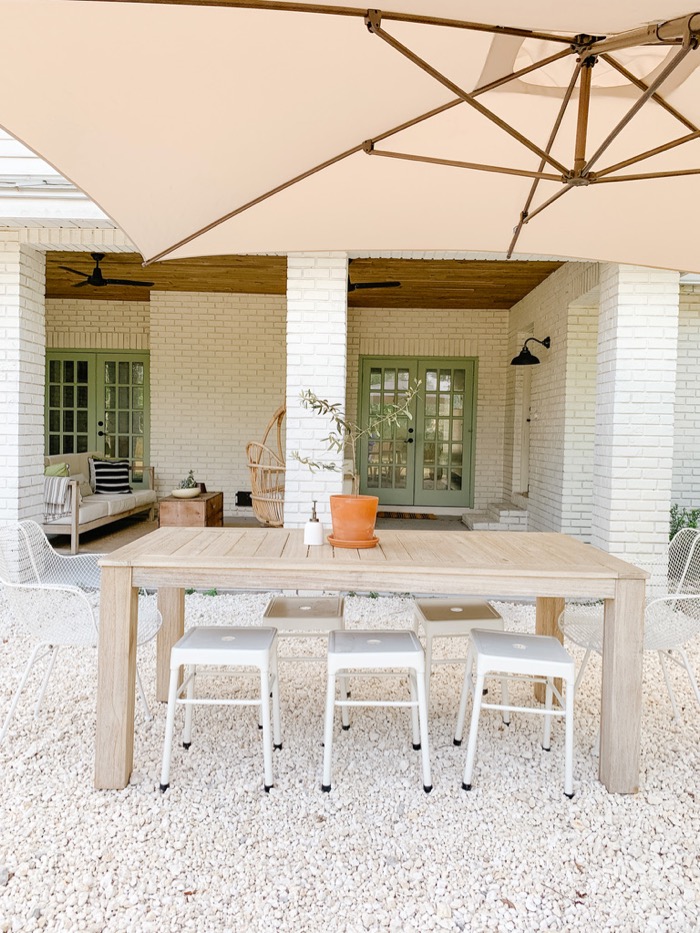
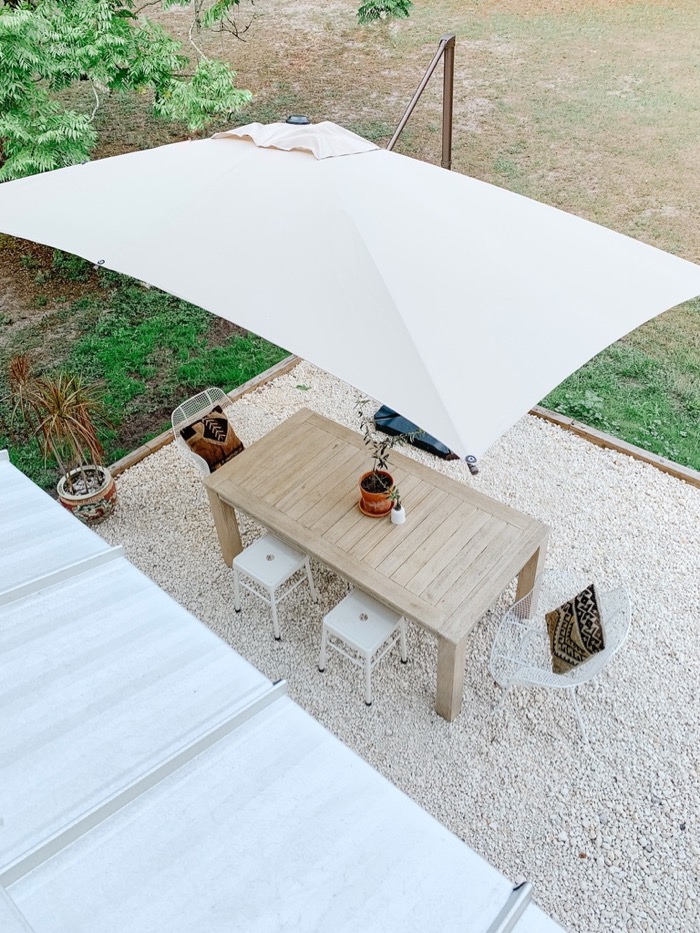
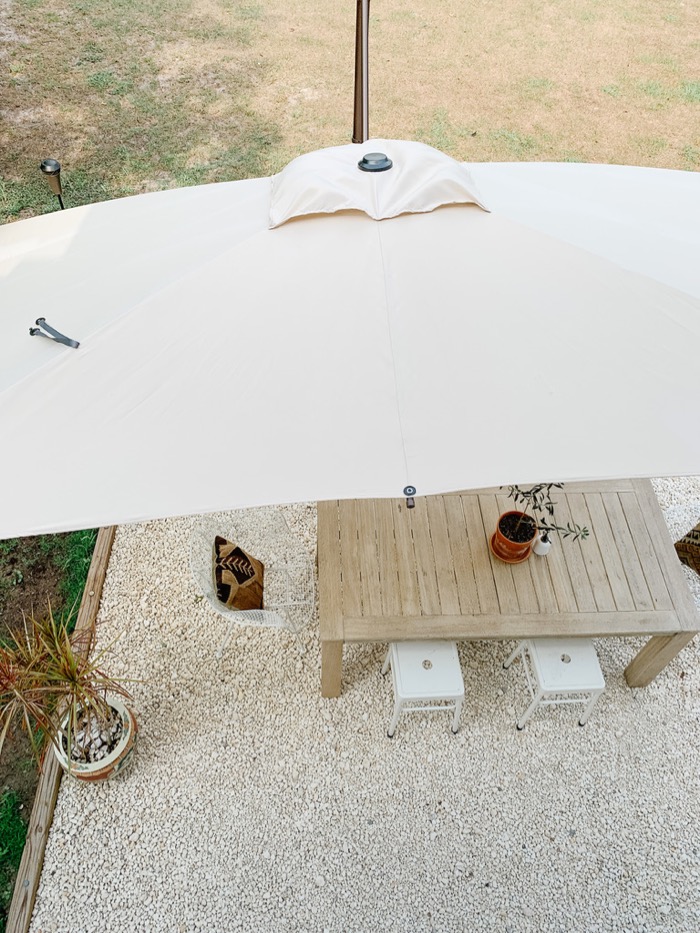
Then we spread out the gravel and decorated the area! I moved the outdoor dining table to the gravel section and rearranged the lounge furniture on the covered portion of the patio.

We used all of our existing outdoor furniture and added a large patio umbrella. 
The patio umbrella is 12.5′ x 8′ rectangle umbrella. It has 6 convenient tilt positions for that evening sun and the fabric is UV and fade-resistant. Our back patio faces west, so we needed an umbrella that would offer great coverage. I love the size and scale of this one and it’s great looking, too.
If you’re in the market for a patio umbrella, Abba Patio is offering a 15% discount sitewide to my readers using code: BD15.
It’s been so nice to grill and eat dinner al fresco. The back patio gravel extension has been put to good use and I’d definitely recommend something like this if you’re looking to maximize your outdoor entertaining space. It was one of the quickest, least expensive projects we’ve done around here!
Shop the post:

Pin for later:


5 Responses
Hi Becky! This looks great. I’m looking forward to making this affordable upgrade in my backyard. Just wondering if you have any puddling in the gravel when it rains.
Hi there! No, not at all but our gravel area is a bit raised so it’s higher than the ground around it encouraging drain-off. Maybe something to consider when you prepare the ground for gravel. 😉
Hi Becky, we are going for a very similar look and we are also here in the Tampa Bay Area. I have two questions – is it easy to walk on the gravel and also is the furniture stable on it? And two, would you mind sharing the local company you used for the gravel?
Thank you so much!
Hi! It is not feet-friendly if barefoot. A pebble would be better suited for that. We used this because we matched what we already had in the garden and it’s inexpensive and not a permanent solution for us (someday we will add a pool and have to remove all of this.) We use Rogers in Lutz for all of our landscaping rock, sand, dirt, etc. They’re great.